

")
Would you like to restore the default settings for your WordPress database?
It may be necessary to restore your database to its initial state if you are working on a test site or local server.
With just a few clicks, you can restore your WordPress database to its original configuration by following the instructions in this article.
Here’s a brief rundown of the steps this tutorial will cover:
Step 1: Prior to the reset, create a WordPress backup
Step 2: Return to Default Settings for Your WordPress Database
Step 3: Use a backup to restore the WordPress database (optional)
All set? Now let’s get started.
Step 1: Prior to the reset, create a WordPress backup
WordPress uses a database to hold all of the content on your website. This contains the settings for your plugins and theme, media files, pages, posts, and more.
Sometimes you may want to start over by resetting to a fresh install if you have been working on a test site on a local server or a staging site.
The quickest way to accomplish this is to reset your WordPress database. It eliminates all of the data associated with WordPress while leaving all files on your web hosting server intact.
However, all of the data will be permanently lost if you reset your WordPress database. It is irreversible.
Before moving forward, we advise creating a full WordPress backup. If you don’t want to backup your entire website, you can also back up just the WordPress database.
We will now demonstrate two ways for you to promptly create a backup of your WordPress database prior to the reset. You can select the option that best suits your needs.
Method 1: Use Duplicator to Create a WordPress Database Backup
The greatest backup plugin for WordPress available is called Duplicator. It enables you to quickly restore your WordPress website from the backup and to simply backup your website.
Installing and turning on the Duplicator plugin is the first step.
Note: There is also a free version of Duplicator that you can use. However, we recommend upgrading to the paid plan to unlock the full potential of the plugin.
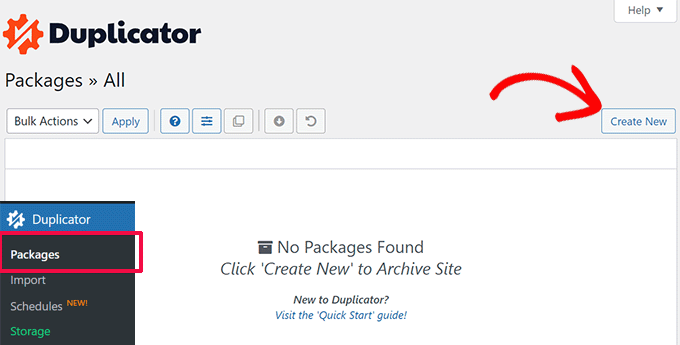
After activation, select the ‘Create New’ button from the Duplicator » Packages page.
The next step is to give your backup a name.
To proceed, click the “Next” button.

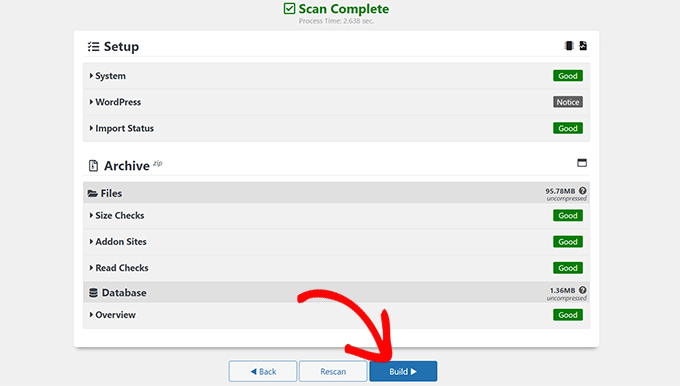
At this point, Duplicator will scan your WordPress website and display the findings.
If you are using an outdated version of WordPress or don’t have a WordPress security plugin installed, it might display some notices.
These alerts are not to be ignored. If everything else appears to be in order, click “Build” to proceed.
The plugin will display the available downloads and create a backup of your WordPress database.
To proceed, just click the “Download” and “Both Files” buttons.
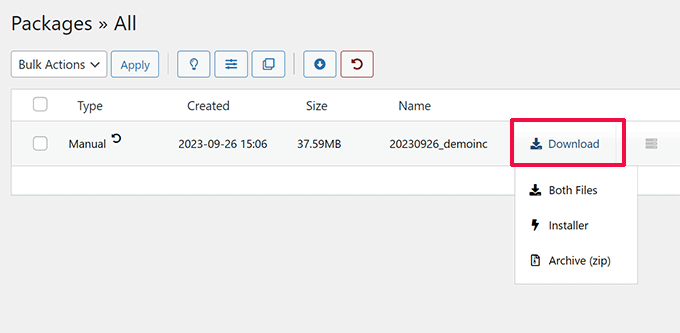
At this point, Duplicator will download the Installer and Archive files to your computer.
Method 2: Use Advanced WP Reset to Create a Database Backup
You will need to use the Advanced WP Reset plugin for this method. You will utilize the same plugin to reset your WordPress database in the following step.
The drawback of this backup strategy is that phpMyAdmin will need to be used to restore your WordPress database.
Installing and activating the Advanced WP Reset plugin is the first step.
After activation, navigate to the ‘Snapshots’ tab on the Tools » Advanced WP Reset page.
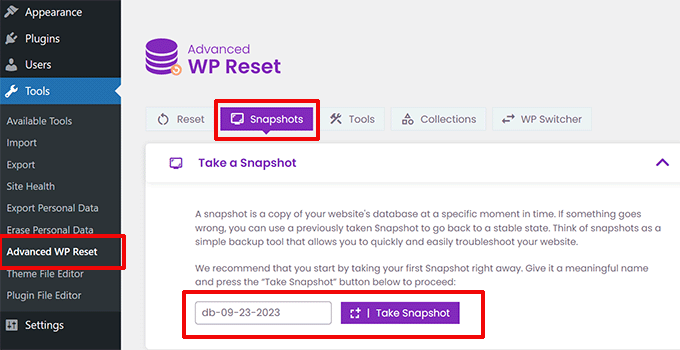
Give your backup file a name, and then select “Take Snapshot.”
Your database will now be copied and stored as a backup by the plugin. It is included in the list of available snapshots.

However, the plugin will also remove this snapshot if you reset your WordPress database. To use it later, you must save it to your computer.
After expanding the snapshot options by clicking the plus [+] icon, select “Download.”
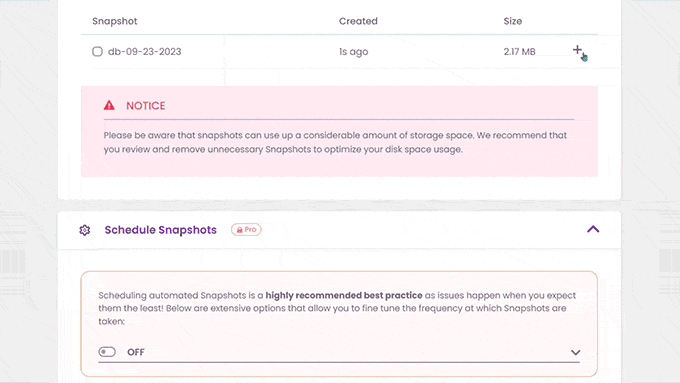
Now your database backup will be downloaded to your computer in the form of a SQL file.
Step 2: Return to Default Settings for Your WordPress Database
The Advanced WP Reset plugin must now be installed and enabled.
Next, navigate to the ‘Reset’ tab on the Tools » Advanced WP Reset page.
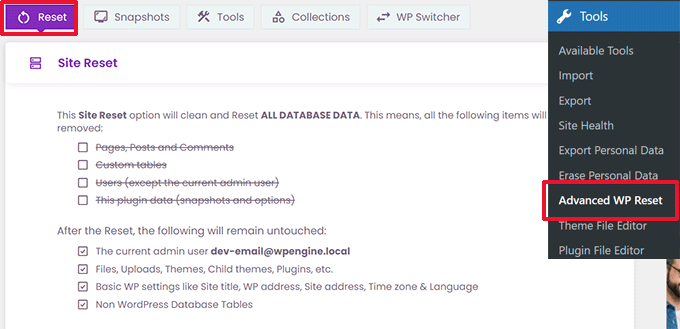
The plugin will display all of the data it will reset under the Site Reset section. Included in this are the following:
Posts, pages, and remarks
bespoke database tables (made by you or with an on-site WordPress plugin)
Users not including the active administrator Advanced WP Reset plugin data (including settings and snapshots)
It will indicate which data won’t be erased beneath that. This comprises the subsequent items:
The user account for the administrator
Files, media library uploads, themes, plugins, and additional resources. But any theme or plugin data kept in the database will be removed.
Basic WordPress settings: time zone, language selections, site title, WordPress address, and site address
databases that are not WordPress-based. The table prefix that you have set in your WordPress database settings is not shared by these tables.
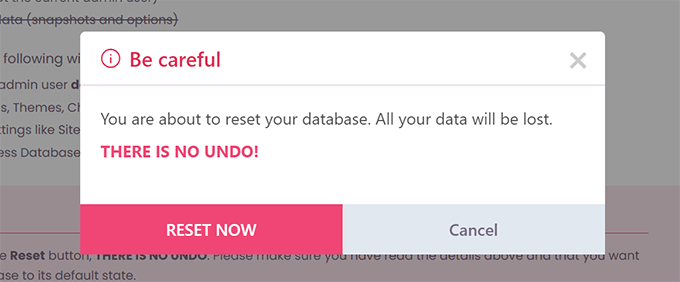
Simply type “Reset” under the Warning label and click the “Reset” button if everything appears to be in order.

Another pop-up warning will appear as a result.
To proceed, just click the “Reset Now” button.
Your WordPress database will now be reset to its initial settings by the plugin.
You will see a success message once everything is done.’
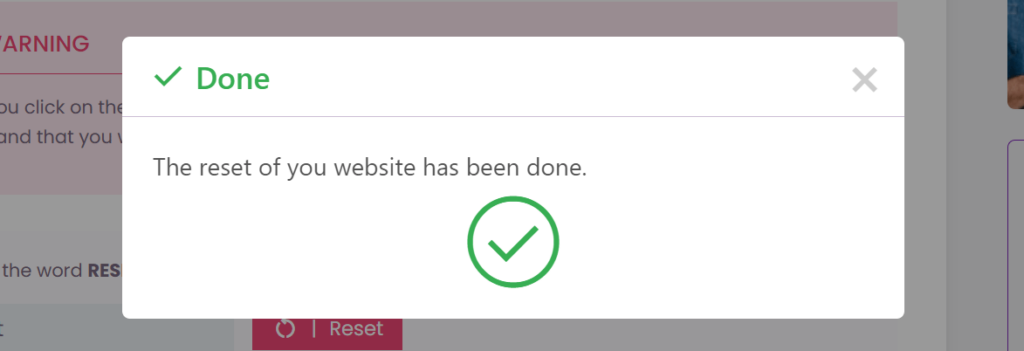
You can now keep using the default database settings on your website.
Note: When the plugin is reset, it will recreate the default WordPress content that is included with a new WordPress installation. It has three sections: “A Sample Page” under Pages, “Hello World” on the blog, and “A Sample Comment” under Comments. You are welcome to remove those by hand.
Step 3: Use a backup to restore the WordPress database (optional)
You can restore your WordPress database from the backup you made in the first step if, for some reason, restoring it to its original configuration wasn’t successful.
First Method: Restore Backup Duplicator Database
Here’s how to restore your website if you used the Duplicator plugin to create a backup of your WordPress database.
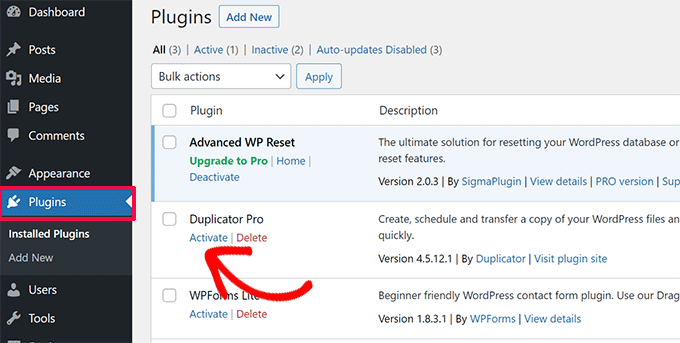
All other installed WordPress plugins on your site will be deactivated by the Advanced WP Reset plugin during the database reset.
To activate the Duplicator plugin, navigate to the Plugins page within the WordPress admin area.
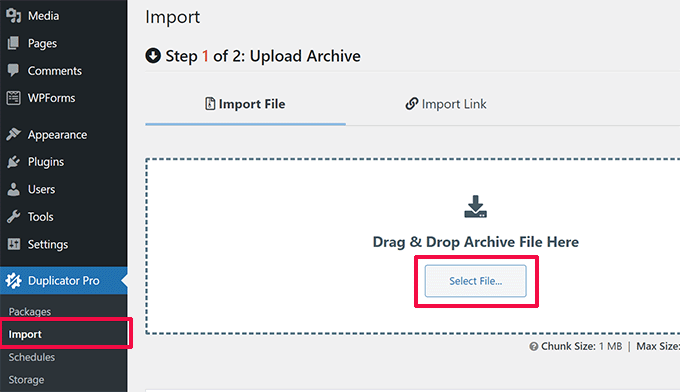
After activating the plugin, you must go to the Duplicator » Import page.
The Archive file that you downloaded in the first step must be uploaded here.
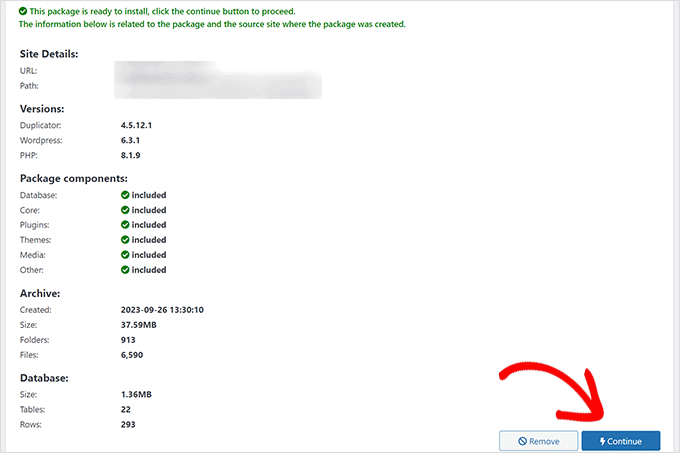
Following that, the plugin will examine your archive file and display the package information.
To start the import, simply click the “Continue” button if everything appears to be in order.
You might be prompted to confirm that you wish to proceed without a recovery point on the screen that appears after that.
You don’t need to make a recovery point because you already have the most recent backup.
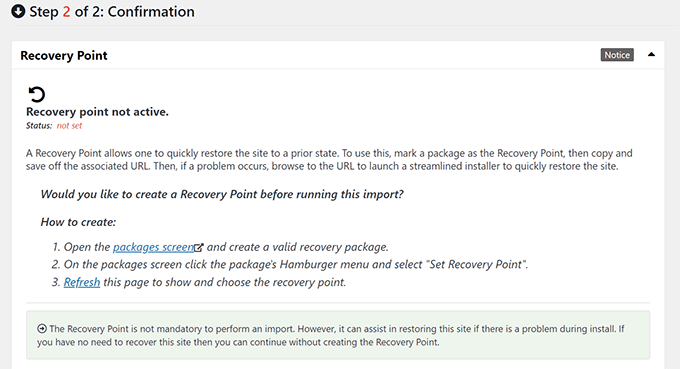
Go to the bottom of the page by scrolling down.
Under the system overview, you can see how many pages, posts, comments, and media there are. To proceed, click the “Launch Installer” button.
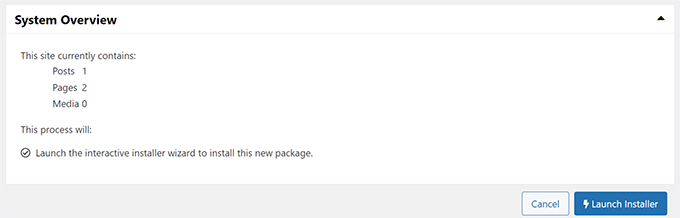
This will start the installer for Duplicator.
The installer will select “Restore single site” as your restoration type by default when it launches.
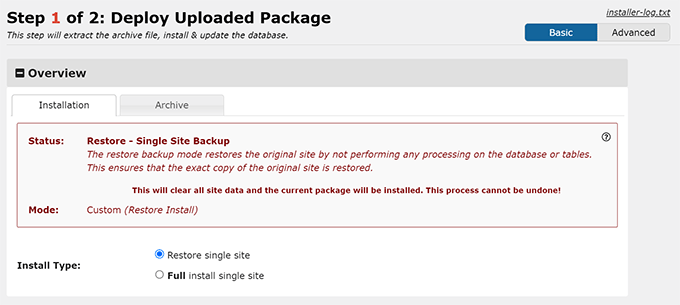
To reach the Validation section, scroll down.
This is where the recovery point warning appears once more. The “I have read and accept all terms and notices” option has a box that you must check.
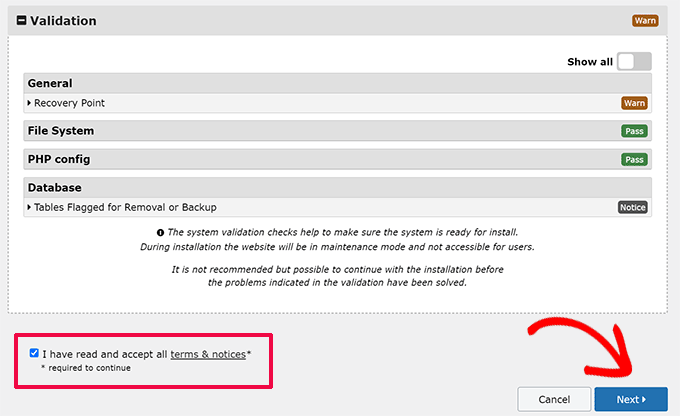
To proceed, click the “Next” button.
You will now see a popup with your installer settings displayed by Duplicator. Please select “OK” by clicking the button.
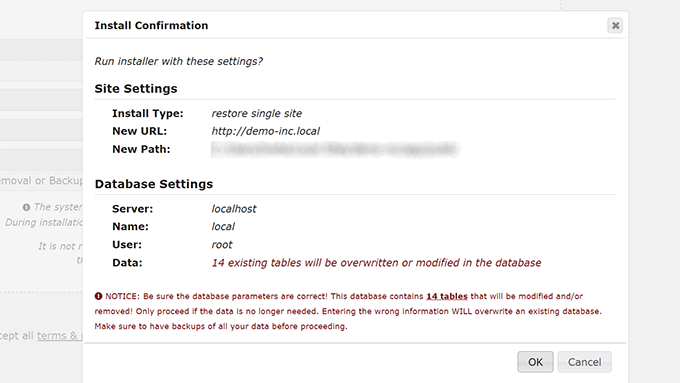
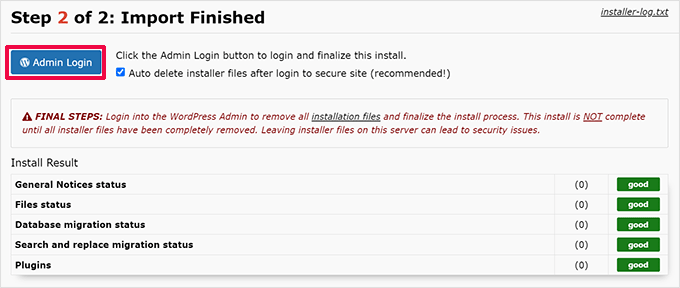
Now, Duplicator will begin restoring your WordPress database and importing your website from the backup.
Upon completion, a success message will appear along with a button to access the WordPress admin area.
Method 2: Using a SQL file, restore the database backup
Here’s how to restore the database if you used the Advanced WP Reset plugin’s Snapshots tool to save your WordPress database method.
You must launch phpMyAdmin first. With its user-friendly interface, this web-based tool makes database operations simple to accomplish.
Enter the control panel for your WordPress hosting account (cPanel) if the website you are attempting to store is hosted on your web server.
You must then navigate to the Database section and select the “phpMyAdmin” button.
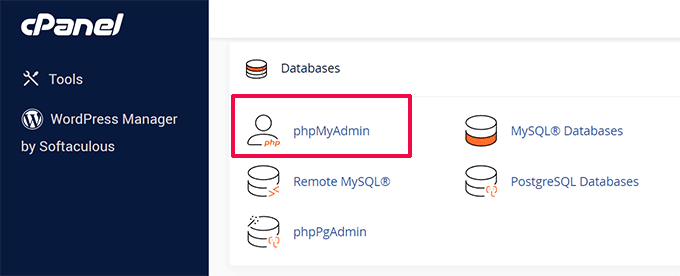
phpMyAdmin will open in a new tab on your browser as a result.
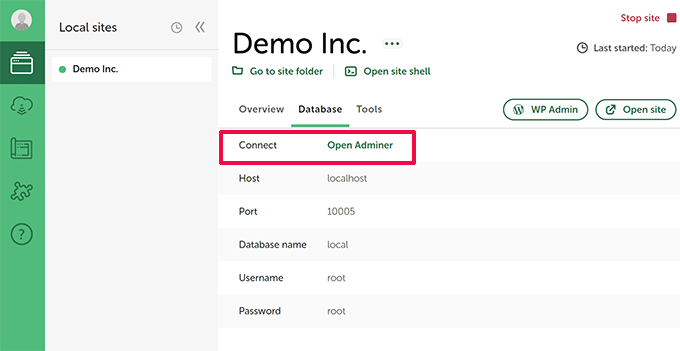
However, if you were using your computer to work on a local website, you could open phpMyAdmin or a comparable tool from the program you use for local sites.
Local is what we advise using instead of phpMyAdmin. Rather, Open Adminer is used for database management.
Verify that you have chosen the database for your website once you are in phpMyAdmin.
By selecting the ‘Check all’ box located at the bottom of the table list, you can choose to view every database table in phpMyAdmin. Next, choose “Drop” from the drop-down menu that appears under “With selected.”
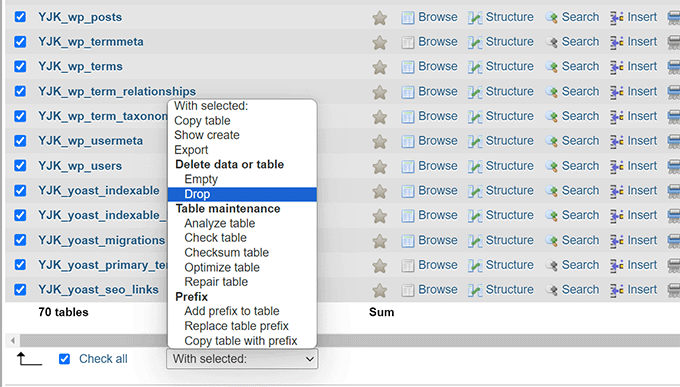
This will clear the database in WordPress.
At this point, you can choose the SQL file you previously downloaded by clicking the “Choose File” button on the “Import” tab at the top.
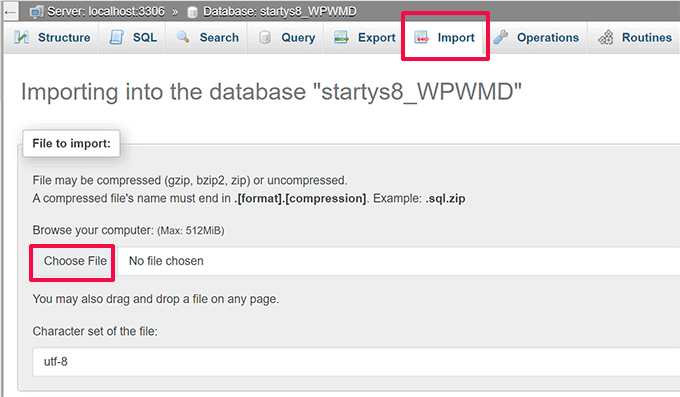
Once you’ve selected the file, you can explore the options displayed on the screen. Most websites can be used with the default settings.
Click the “Import” button after swiping down to the bottom of the page.

Your SQL file will now be uploaded and executed by phpMyAdmin.
Following that, a success message will appear.

Now that you’ve logged in, you can visit your website and see your database has been reset to its original configuration.
We hope this post was helpful in teaching you how to return your WordPress database to its original configuration.