


Do you have questions about how to accept payments using Alipay in WordPress?
More than a billion people use the Chinese digital wallet Alipay. By allowing Alipay payments on your WordPress website, you can reach a wider audience and possibly boost sales.
We’ll go over how to accept Alipay payments in WordPress in this article. In this manner, you can reach a sizable user base that favors this mode of payment.
Why Should WordPress Allow Alipay Payments?
With the help of the payment app Alipay, customers can send and receive money online. It is a major force in the Chinese market and is becoming more well-known abroad, in Singapore, Malaysia, Hong Kong, and other places.
Additionally, not all users are from other countries. Alipay is also used by a lot of domestic dropshipping businesses that purchase goods in bulk. This is so because Alibaba and AliExpress, two massive eCommerce companies, accept Alipay as their main form of payment.
With Alipay on track to serve over 2 billion users globally, accepting it as a form of payment will enable you to take advantage of a sizable market and draw in clients from areas where Alipay is widely used.
Having said that, let’s discuss the two methods you can use to accept payments from Alipay. You can jump ahead to your preferred method by using our links:
Method 1: Use WordPress Simple Pay to Quickly Receive Alipay Payments (Recommended)
Method 2: Use the Stripe Payment Gateway Plugin to Accept WooCommerce Alipay Payments
Method 1: Use WordPress Simple Pay to Quickly Receive Alipay Payments (Recommended)
For this method, we will use WP Simple Pay, which is the industry’s top Stripe payment plugin. You can take payments using this plugin without having to set up any difficult APIs on your website.

Businesses using Stripe can now accept payments from clients who wish to pay with Alipay thanks to WP Simple Pay’s integration with Stripe’s payment options.
The good news is you can use WP Simple Pay Lite given that Alipay payments are accepted. Moreover, it is completely free.
Note: To access the Alipay payments form, you must have WordPress Simple Pay Pro. You can only create an Alipay payment button to add to your pages using the free version. Additionally, without the paid plan, you won’t be able to create on-site payment forms.
The majority of businesses should use WordPress Simple Pay Pro. This premium version features an advanced form builder, buy now, pay later plans, and acceptance of over ten different payment methods.
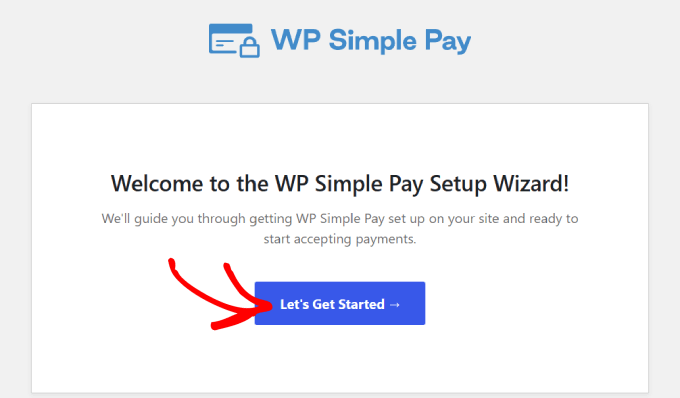
Step 1: Set up and Turn on WordPress Simple Pay
The WP Simple Pay setup wizard will be automatically launched by the plugin upon activation. To begin, you must click the “Let’s Get Started” button.
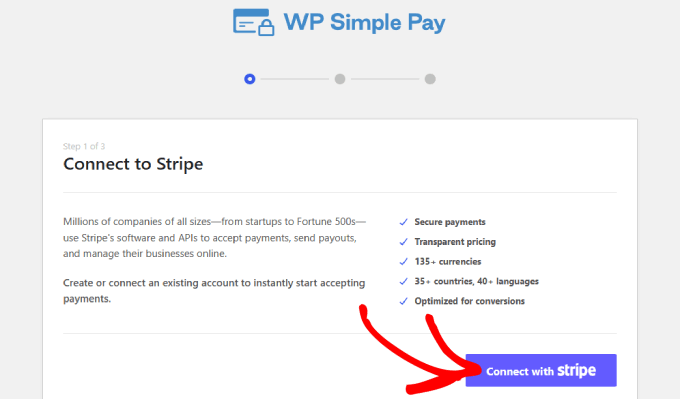
Step 2: Finish the Wizard of Setup
You’ll be directed to the following stage of the procedure. After that, you’ll need to link to an already-existing Stripe account or create a new one. To proceed to the following screen, click the “Connect with Stripe” button.
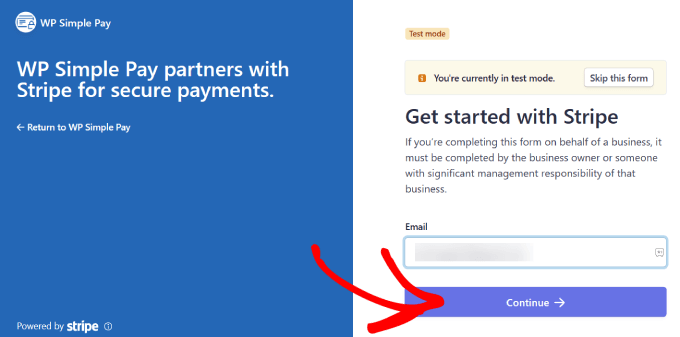
You can enter your email address and click “Continue” if you already have a Stripe account.
Your website will incorporate your Stripe data. In this manner, your Stripe account will receive all payments that you receive.
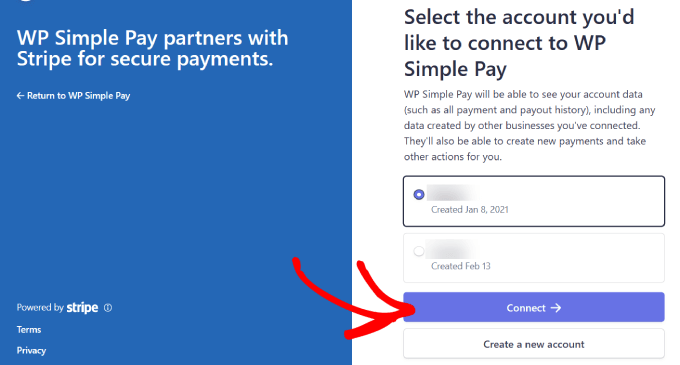
You will then be asked to choose your Stripe account from this menu.
Next, click “Connect.” Alternatively, you might decide to make a new account.
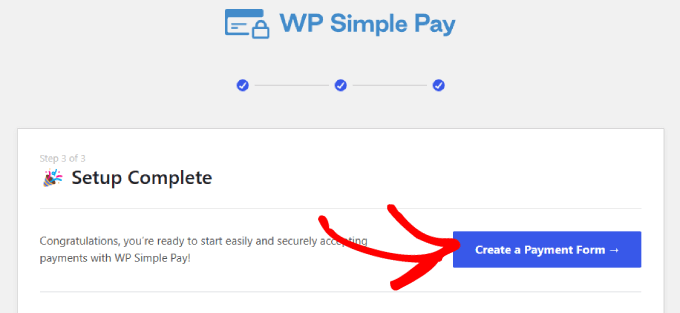
Step 3: Make a Form to Receive Payments via Alipay
You’ll need to make a payment form after linking your Stripe account.
Click the “Create a Payment Form” button now.
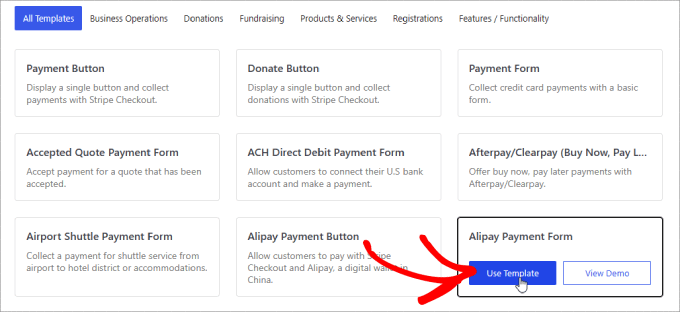
You’ll arrive at a template library where you can select a pre-made template for your form from a variety of options.
After that, locate the “Alipay Payment Form” and select “Use Template.”
Upon selecting the template, you will be redirected to an easy-to-use drag-and-drop builder.
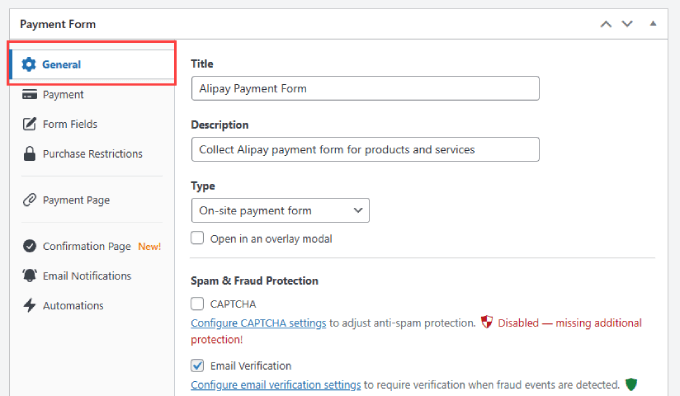
Additionally, you’ll be asked to adjust the General settings. This is where you can change the form type, title, description, and other elements.
To stop phony orders, there are additional options to include an email verification button and a CAPTCHA.
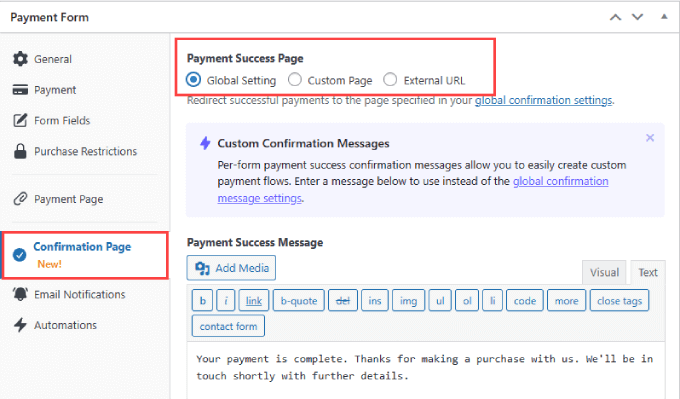
The “Confirmation Page” tab allows you to specify the URL that should be displayed to users after they submit the form.
When a customer makes a payment, WP Simple Pay will automatically display a custom success page. However, if you would prefer to display an alternative page hosted on your WordPress website, you can choose “Custom Page.” You can even use this as an opportunity to upsell them on additional goods or services and direct them to a thank-you page.
Alternatively, you can choose “External URL” if you would rather direct visitors to an outside website. Add a “Payment Success Message” to express gratitude to customers and let them know what to expect from you in the future.
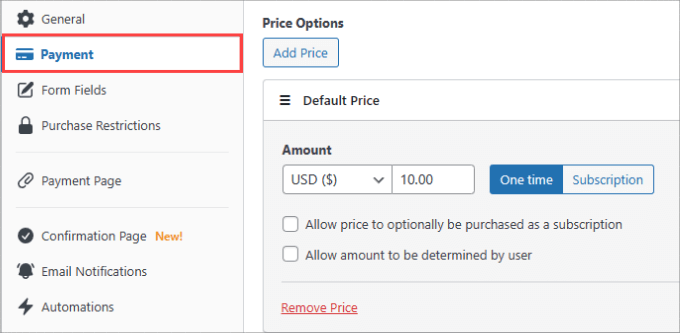
You then need to select the ‘Payment’ tab from the menu on the left.
This is where the “Default Price” will be set.
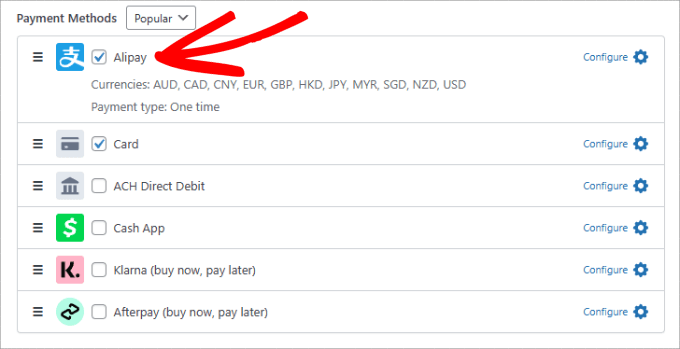
Additionally, to start accepting Alipay payments on your website, make sure to check the box next to Alipay under “Payment Methods.”
Other options for payment include a card or direct deposit via ACH. You will have complete access to 13 payment options, including Cashapp, Klarna, Apple Pay, Google Pay, Afterpay, and more, if you have WordPress Simple Pay Pro.
Next, select the “Form Fields” tab located on the left. You can add or modify any form fields that are already there.
To add a field, simply select “Add Field” from the dropdown menu under “Form Fields.”
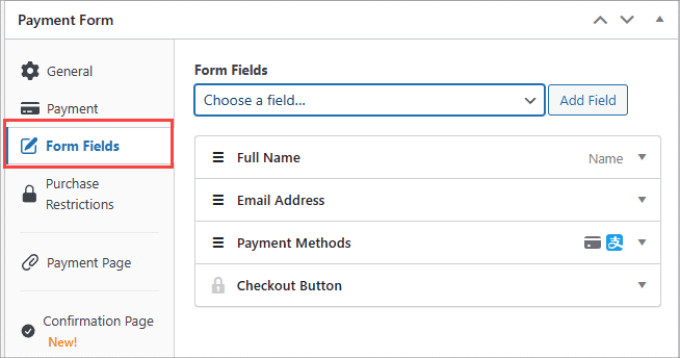
There are many options available to you, including address, phone number, coupon, and more.
Step 4: Submit Your PayPal Form Online
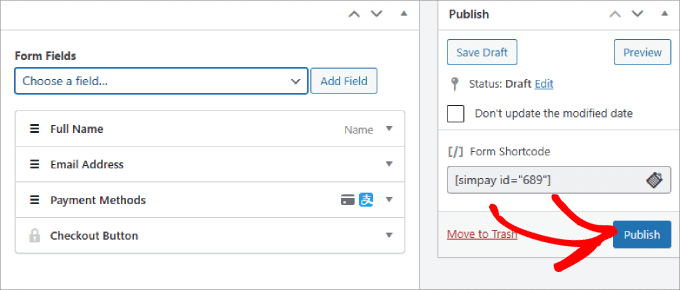
When your form is prepared, remember to save your modifications. You are now prepared to add your Alipay payment form to your website and publish it.
Click the “Publish” button located on the right side of the screen.
The form must now be embedded into your WordPress website. Simply navigate to the page or post where your form is to be included. This could be on a product page, services page, or any other page.
Press the “+” button in the upper left corner.
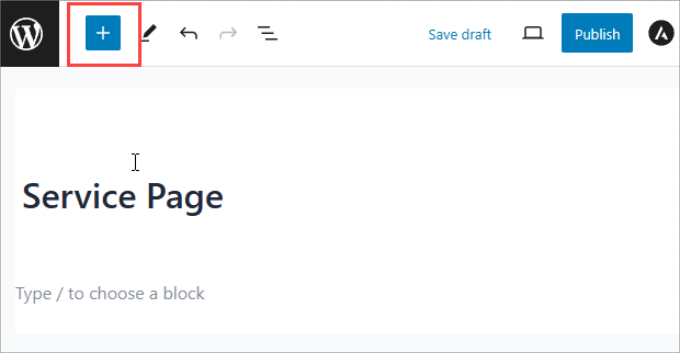
To add the WP Simple Pay block to your page, search for it.
The block will show up in the block editor.
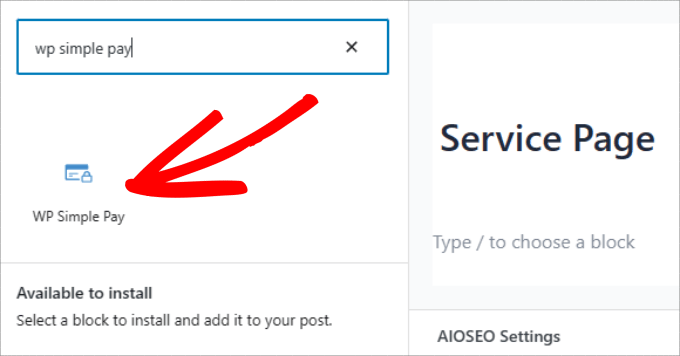
Just choose the recently created Alipay payment form from the dropdown menu.
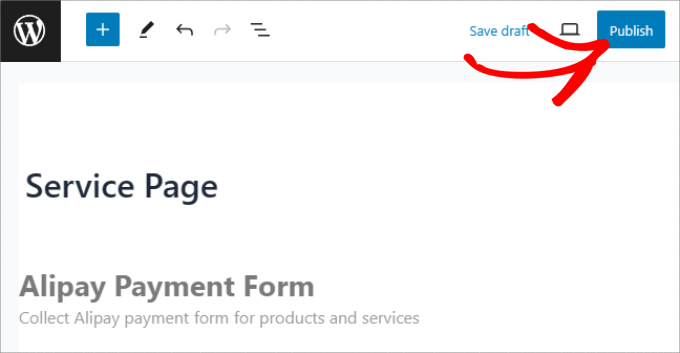
The form will appear integrated into your page.

Lastly, select “Publish” or “Update.”
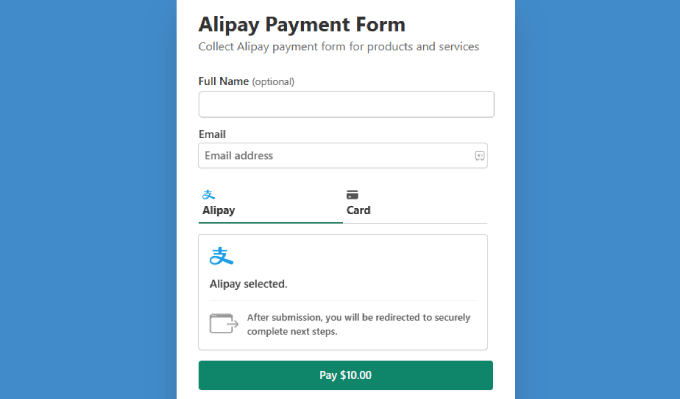
That’s it for you. You now understand how to accept Alipay payments on your WordPress website with ease.
Remember to test the form to make sure payments are processing.
This is an illustration of how the form ought to appear:
Method 2: Use the Stripe Payment Gateway Plugin to Accept WooCommerce Alipay Payments
If you manage a WooCommerce store, you might want to consider switching to a payment plugin. It might not integrate as smoothly into the form even if you can add a WP Simple Pay button or form to your product pages.
Alipay can be seamlessly integrated into the payment page as a checkbox that customers can mark during the checkout process with the help of a WooCommerce plugin.
Step 1: Set up the Stripe plugin for WooCommerce
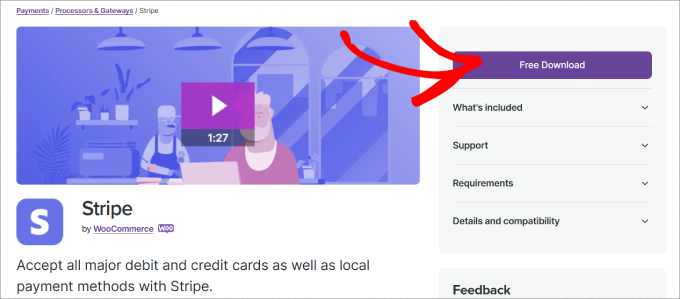
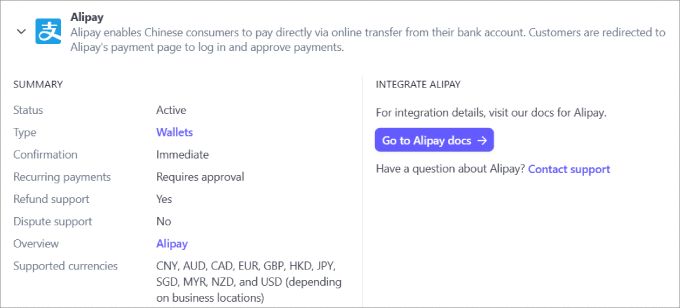
You must download the free WooCommerce Stripe plugin in order to get started. Users will be redirected by this plugin to the Alipay payment page, where they can log in and approve the transaction.
Click “Free Download” on the WooCommerce Stripe plugin page.
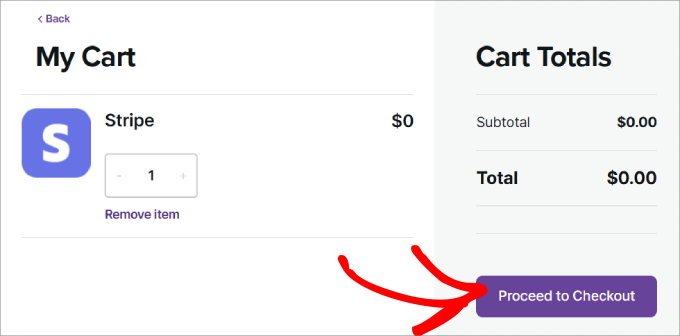
You will be taken to the cart page from this point on.
Verify the order details before clicking “Proceed to Checkout.”
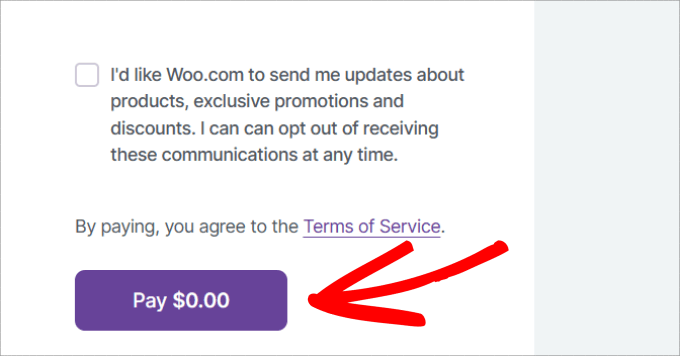
You will be directed to the payment page. Entering your email address and name is all that is required.
Simply select the “Pay $0.00” button after that.
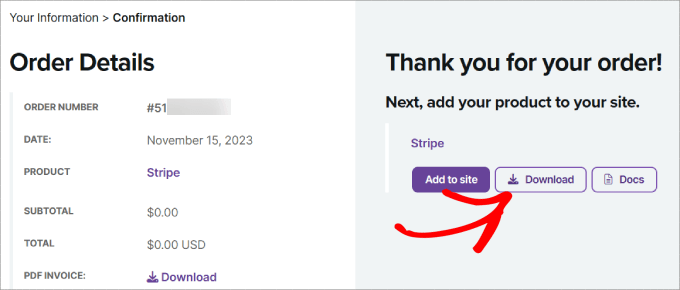
This will take you to the “thank you” page.
To download the plugin files to your PC, simply click the “Download” button.
All that’s left to do is upload the WooCommerce Stripe plugin to WordPress and install it.
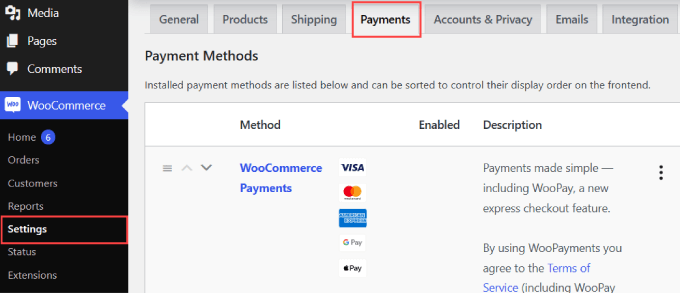
Step 2: In WooCommerce, enable Alipay
You must navigate to WooCommerce » Settings in your WordPress dashboard after activation. Next, proceed to select the “Payments” tab.
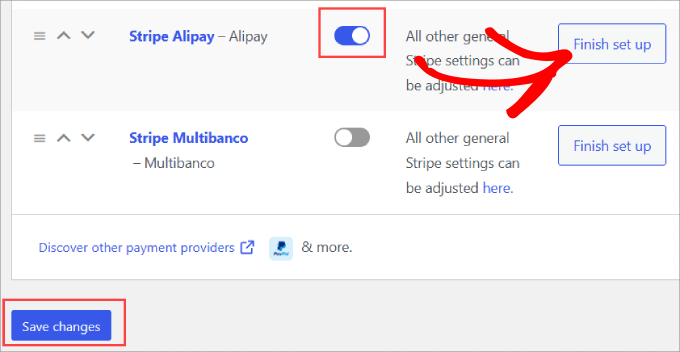
Scrolling down the page will reveal “Stripe Alipay” as an available payment option.
To enable Alipay for your WooCommerce website, just flip the button. Select “Save changes” located at the bottom.
Next, select “Finish set up” by clicking the Alipay option.
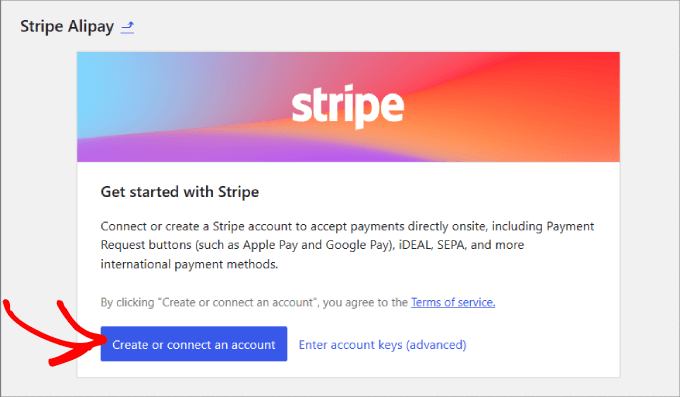
Step 3: Include Your Account on Stripe
Now, you’ll be prompted to link your Stripe account.
You can easily integrate your Stripe account with WooCommerce by clicking the “Create or connect an account” button.
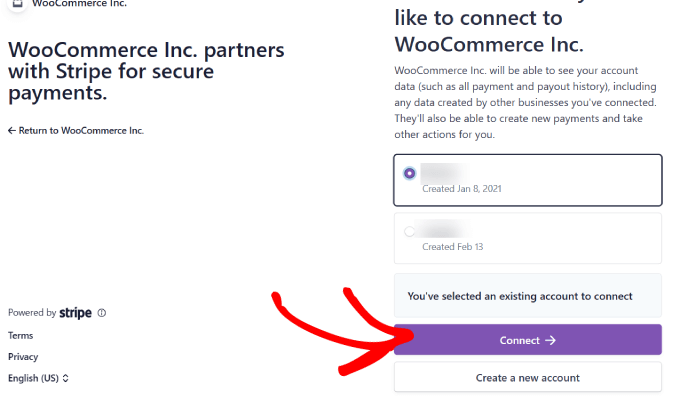
To get started, simply select your Stripe account and click “Connect.”
You can choose to “Create a new account” if you don’t already have a Stripe account.
Step 4: Make Alipay active
Your online store and Stripe account are now fully integrated.
You must return to the ‘Payments’ tab. Click “Manage” next to the “Stripe Alipay” method.
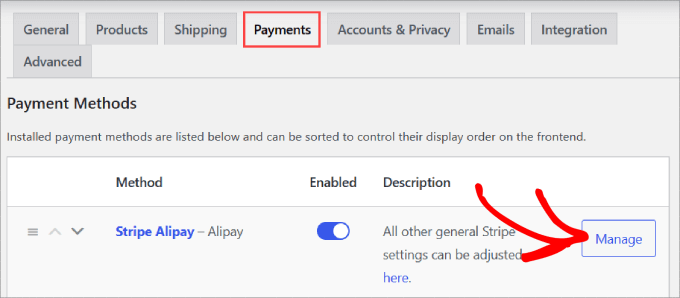
You can adjust the Alipay settings here, including the name and description that show up on your checkout page.
Please select the link labeled “Activate in your Stripe Dashboard.”
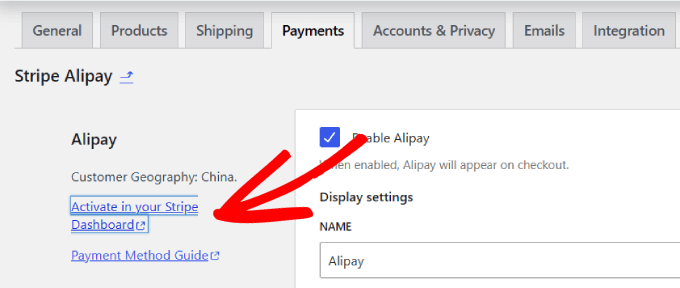
You’ll be taken to the settings page for your Stripe account’s payment method.
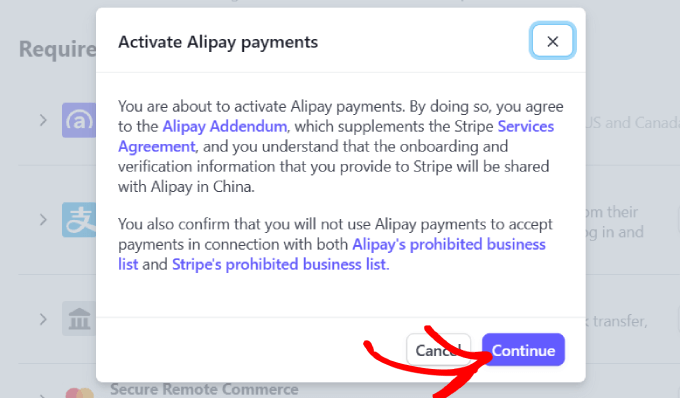
After finding “Alipay” by scrolling down, select “Request access” next to it.

From here, a pop-up window requesting your permission to enable Alipay payments will show up.
You can accept Alipay payments in your WooCommerce store by just clicking the “Continue” button.
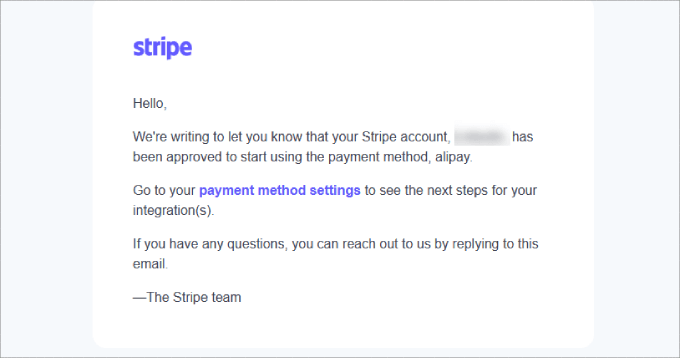
You must wait for Stripe to approve your account after requesting access. You should be able to start accepting Alipay payments in approximately one or two business days.
After your application is accepted, Stripe should send you an email confirming that Alipay has been set up on your account.
Additionally, you should check the payment methods section of your Stripe account to make sure that Alipay does not have the word “Pending” next to it.
If not, you will need to wait for Stripe to approve your request.
All that’s left to do is make sure that your customers can use Alipay when checking out.
Navigate to any product page and follow the instructions for checking out. Customers should be able to pay with Alipay under the order summary.

The customer should be taken straight to the Alipay login page when they place an order. They can complete their payment there by logging into their Alipay account.
The funds then immediately enter your Stripe account thanks to the integration.

That’s it, dear! You can now accept payments using Alipay in your WooCommerce store.
To provide clients with even more options, we also advise including additional WooCommerce payment gateways like Square and PayPal.
We hope this post was helpful in teaching you how to use WordPress to accept payments via Alipay. You might also want to check out our recommendations for the best WordPress tools and plugins for business websites, as well as our tutorial on how to accept credit card payments in WordPress with ease.